In this tutorial, I want to show you how to create instruments using sampler in logic pro x, ever since the 10.5 updates, we logic users have been blessed with two new samplers that make the process a lot easier than it was in previous logic versions.
When we say two samplers, we actually mean one, the main being called Sampler, and then a less featured rich version called Quick Sampler.
For the purpose of this demonstration, we are going to use Logic’s main sampler instrument and we will create an instrument using samples from our sample pack Anthology (Electric Guitar Edition).
Step #1 – Create a new instrument track
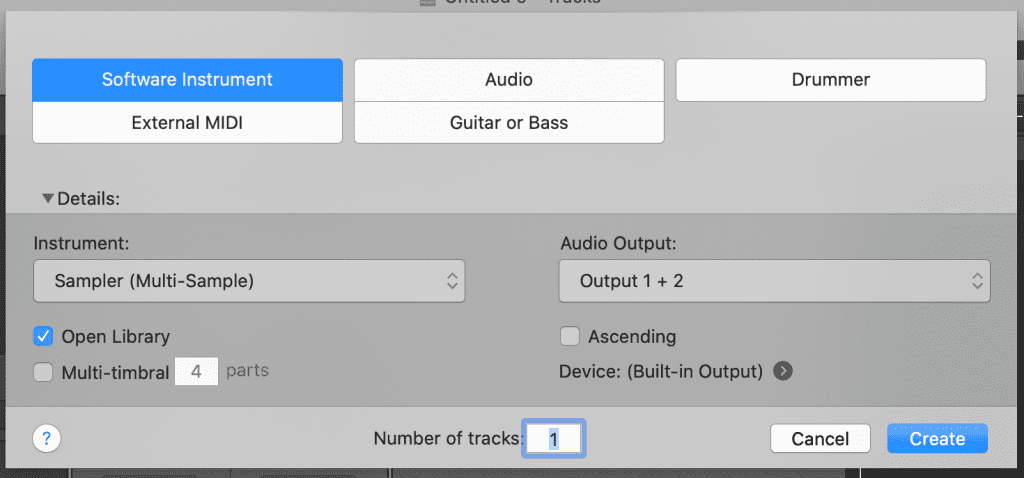
- In Logic Pro, click the + Add Tracks button, located above the track headers.
- Select the track type in the upper part of the New Tracks dialog.
- If the Details area at the bottom is closed, click the Details disclosure triangle to open it.
- Choose the input source from the Input pop-up menu.
- For software instrument tracks: Choose An Instrument Plug-in. When Show Advanced Tools is selected in the Advanced preferences pane, the Input pop-up menu is not available for software instrument tracks.
- Choose the audio output and output channel (or channels) from the Output pop-up menus. Tip: Below the Output pop-up menu, a line of text shows the current output device. To change the output device, click the arrow next to the text, then change the device in the Audio preferences pane.
- Choose Sampler as the plugin instrument
- Click Create.
Step #2 – Click mapping
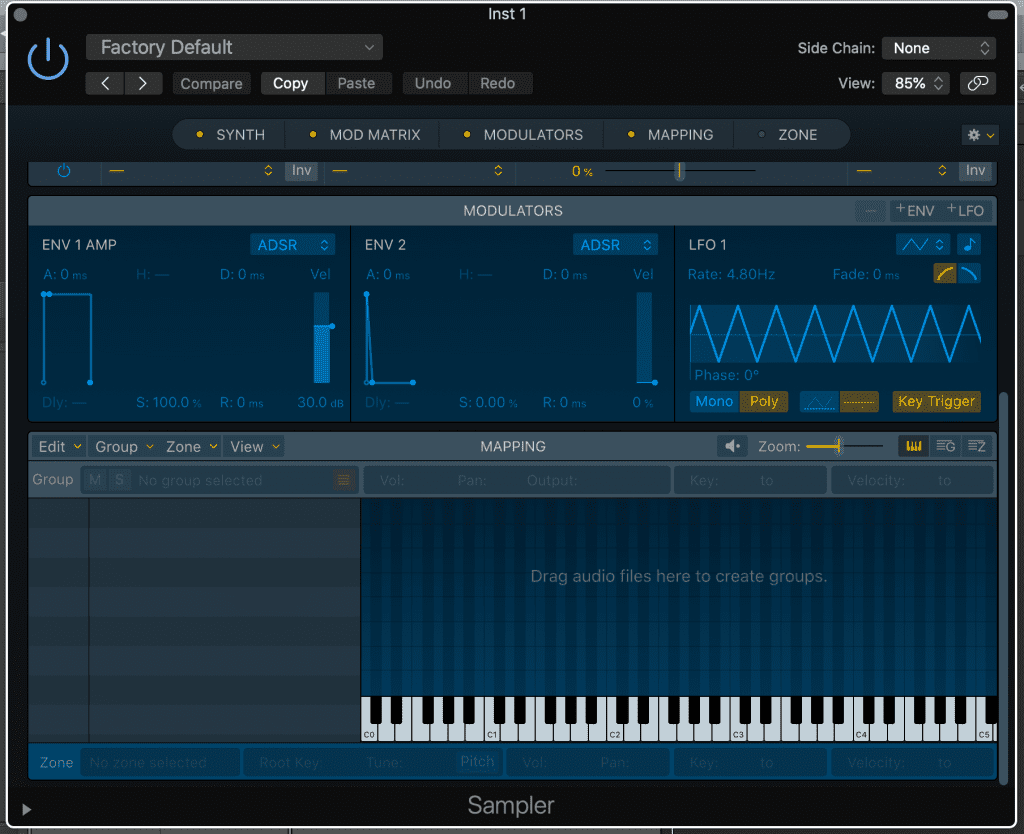
Within the sampler instrument’s interface head over to mapping, this is where we will start to import our samples.
Step #3 – Drag and drop your samples
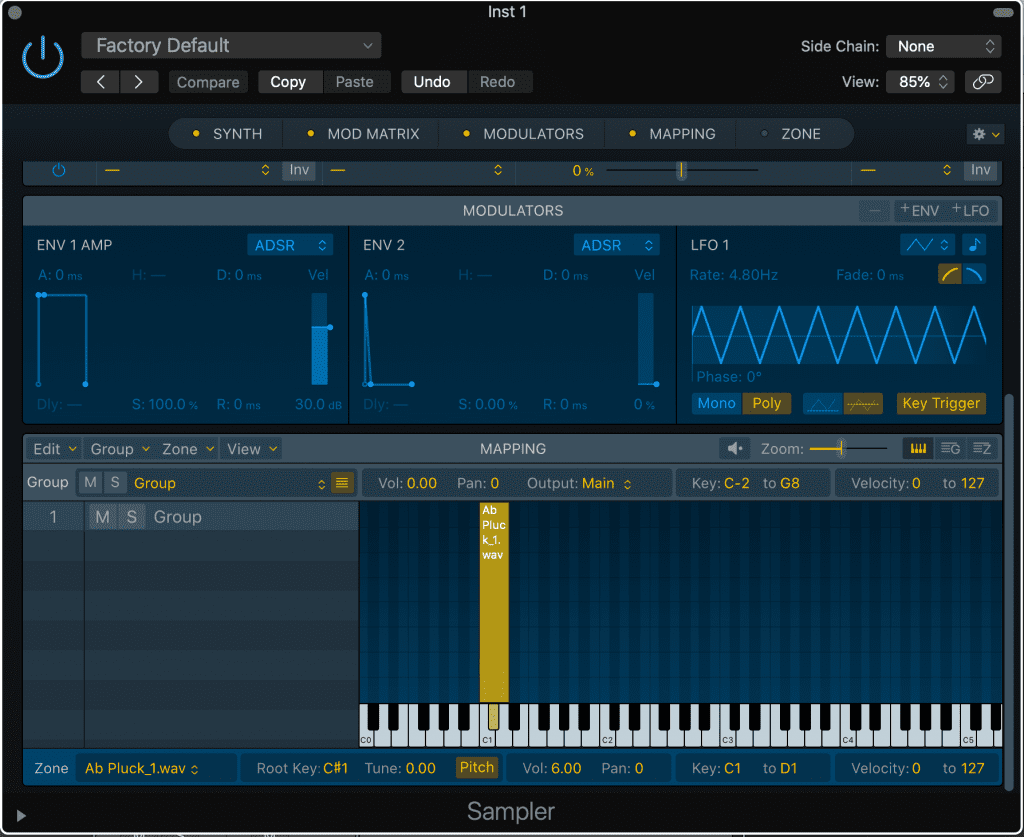
Select which key from Anthology you would like to use and then start dragging and dropping chord samples onto mapping area one by one, (if you are using different samples from another pack and they are all in one folder together you can select all and drop them all at once)
Ensure that each sample is assigned to an individual note like the image displays below:
Edit any sounds that may have overlapped onto multiple keys by moving your curser from left to right clicking and dragging.
Follow this process and import all the chords from the key one by one.
Step #4 – Edit samples
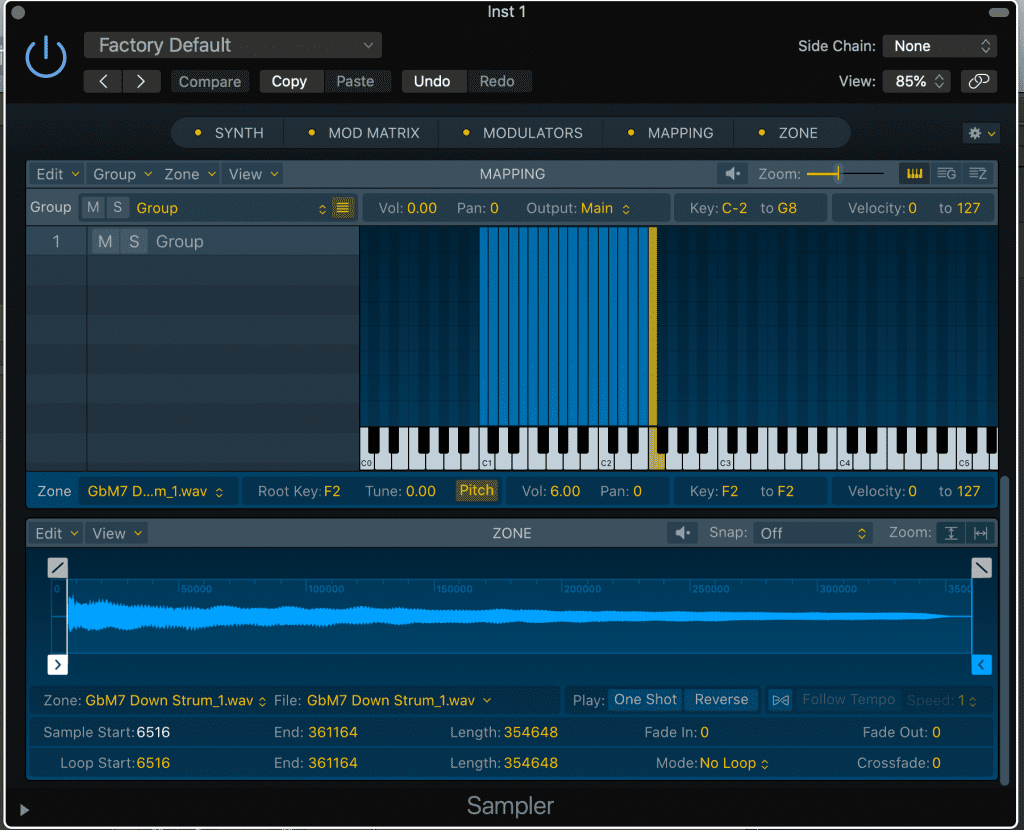
Next to mapping hit Zone and this will enable Samplers audio editor, from here you can edit your samples audio by using the pen and arrow functions to add fades or cut out parts of the sample that aren’t needed, through doing this you can achieve a much smoother transition from sound to sound (or in this case from chord to chord).
Step #5 – Add effects
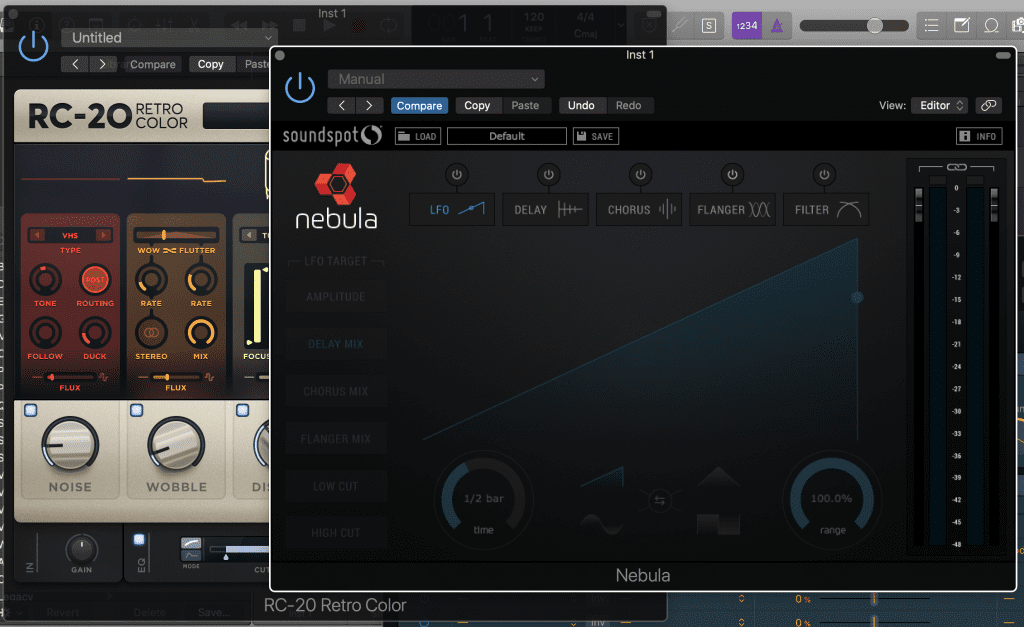
To give your instrument a little extra style you may want to consider adding effects to make it sound more interesting, in this example I wanted to give the chord progression more of a Lo-fi sound, so I added two third-party plugins.
- XLN Audio RC-20 Retro Color
- Soundspot Nebula
Step #6 – Name & Saving
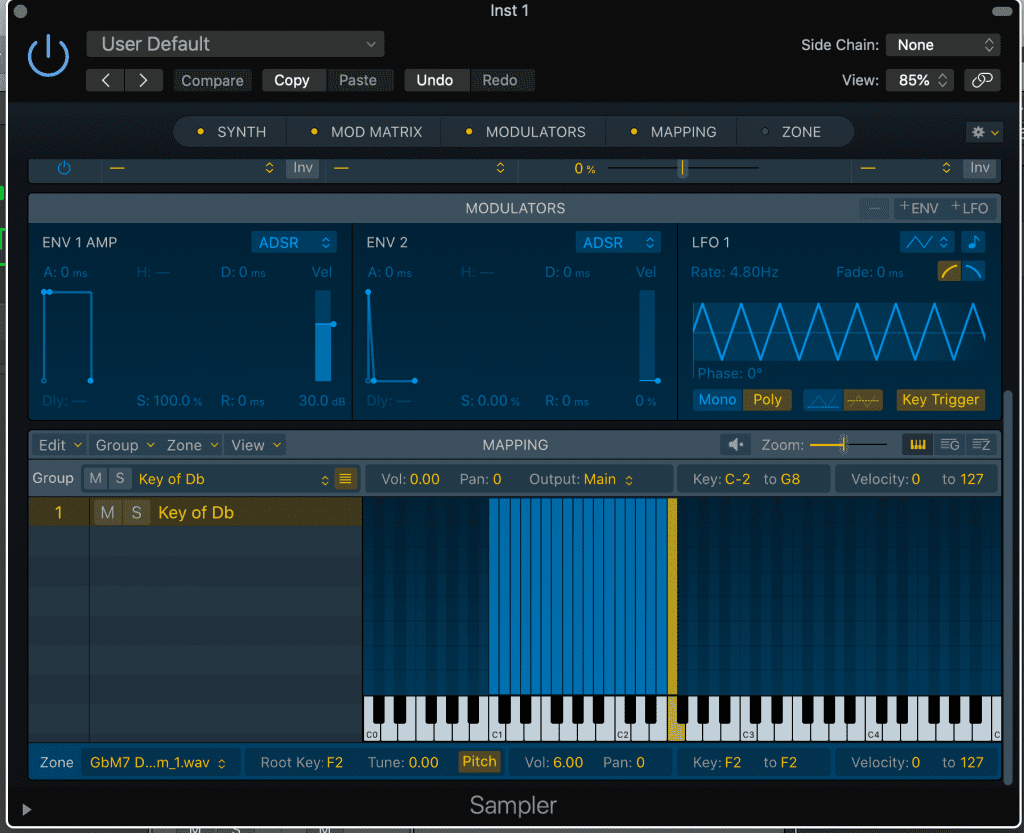
Now you need to save the group name by overwriting the “Group” option that you’ll find next to MUTE and SOLO options, simply click, highlight and type your chosen name.
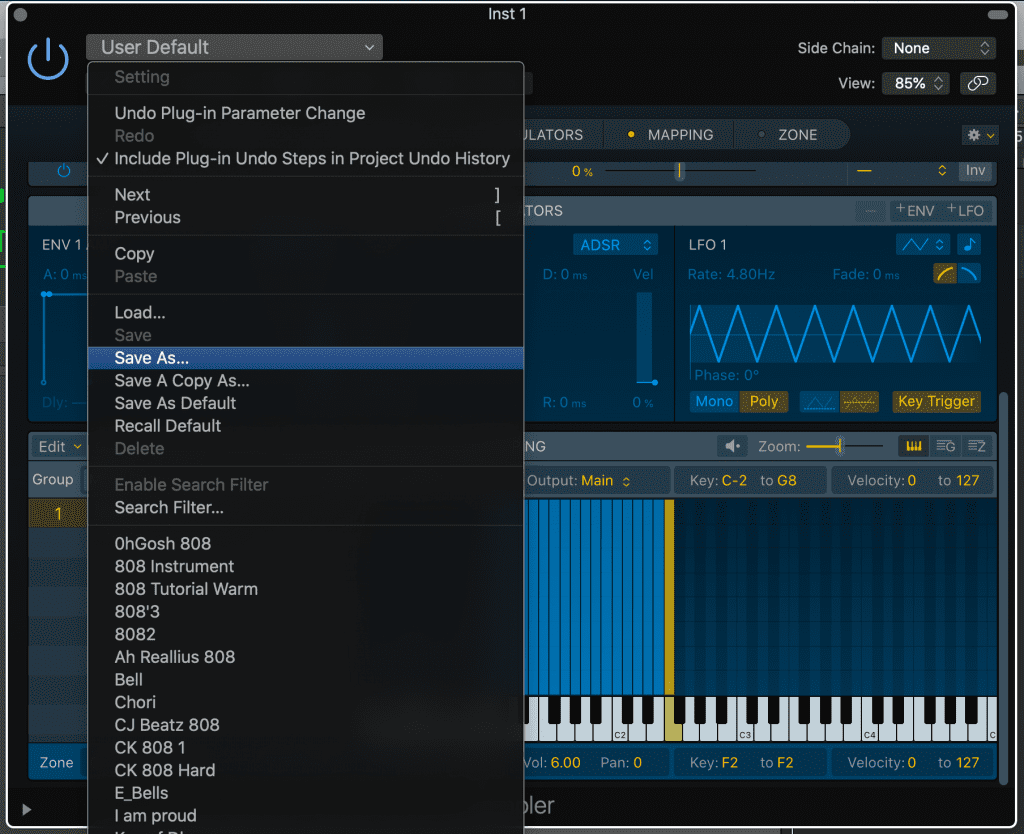
To save your instrument as a preset head up to Factory Default and expand the dropdown menu and select Save As, from here name your instrument, and then hit save.
That’s it! you have now created your first instrument using sampler.
With the addition of the new sampler in the 10.5 updates. it has become A LOT easier to create your own instruments from scratch For long-time Logic users have been waiting for an update to the EXS24 sampler and in our opinion,it is safe to say that sampler dominates over its predecessor not only in features but in overall workflow, GUI and a whole lot more.
This is yet another version of Logic Pro X that’s US $199 new, but you can upgrade for free once you have got it.


